

How To Use Easybcd To Dual Boot
If you're having difficulties making the dual-boot card appear on Windows 10 or Windows 11, there are several potential causes why you tin can wait to deal with this behavior. This article volition walk you through all the possible reasons you might deal with this issue and showcase several available fixes that should permit yous to correct this behavior.
After investigating this particular issue thoroughly, it turns out that there are several mutual scenarios that might spawn this mistake. Here'due south a list of culprits that you should troubleshoot when attempting to fix this issue on Windows 11 or Windows 10:
- The boot menu is non activated – The situation when the multi-boot selection is truly deactivated is the most frequent reason you tin conceptualize dealing with this result. Use an elevated CMD Prompt to verify if the kicking menu is enabled if yous are confident that the dual kick surround was set up successfully.
- Fast Startup forces the default OS – Windows will lock the installation drive if Fast Startup is chosen. As a direct result of this, Windows may not be able to recognize the operating system on a dual-kicking PC. Disable the rapid action functionality if you lot remember the fast startup feature is actually what's causing this behavior.
- The startup and Recovery menu is incorrectly configured – Another circumstance where yous could expect to experience this issue is i in which the dual boot menu is presented for a brusque period of time for you actually to meet it. You may resolve this effect by changing the kick sequence using the avant-garde organization settings or utilizing third-party software if you only run across the menu for a little moment before the default option takes over.
- Corrupted system files – If y'all've reached this point and are still without a workable ready, you should expect into the likelihood that system file corruption has harmed your dual boot arrangement. Applying successive DISM and SFC scans will exercise this.
At present that nosotros have gone over every potential reason why the dual boot card doesn't announced when you boot up your PC (later successfully setting up dual booting on your PC) follow the methods below to troubleshoot the issue.
Note: All the potential fixes beneath presume that you already have configured a dual kicking environment (Windows 10 and 11). If you're looking for specific instructions on how to do this, follow these steps.
1. Enable the Kick bill of fare via CMD
The most common crusade of why you might expect to deal with this issue is a scenario where the multi-boot carte is disabled. If you are sure that the dual kicking environment was gear up up correctly, you should first utilize an elevated CMD Prompt to check if the boot menu is enabled.
Note: If the dual boot carte is disabled, the boot sequence will automatically boot from the default OS instead of allowing y'all to select from the available kick options.
If you're not certain whether the kicking bill of fare is enabled on your Windows surroundings, follow the instructions below for specific instructions on how to enable it:
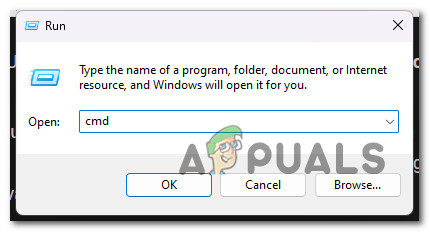
- Press the Windows key + R to open upwardly a Run dialog box.
- Adjacent, type 'cmd' inside the Run dialog box and printing Ctrl + Shift + Enter to open upward an elevated CMD prompt.
Open a CMD window - Click Yes to grant admin access at the User Account Control (UAC).
- Once you're finally inside the elevated CMD prompt, blazon or paste the following command to make sure the boot carte is displayed:
bcdedit /gear up {bootmgr} displaybootmenu yesNote:If y'all see the 'functioning completed successfully' message, the boot card was deactivated, and you've just enabled information technology.
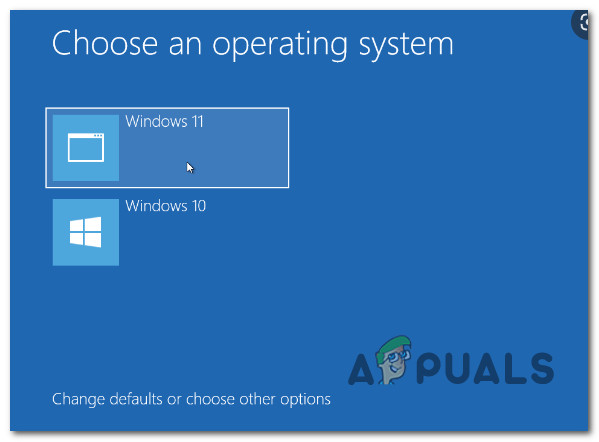
- Restart your PC and see if the dual boot bill of fare appears at the next computer startup.
If this method didn't piece of work for you or the dual boot carte was already activated in your case, motion down to the following method below.
2. Re-configure the Startup & Recovery carte du jour
Some other reason why you might await to see this problem is a scenario where the timeframe in which the dual boot menu is displayed is likewise modest for you to meet it. If you lot briefly see the carte but don't have time to select annihilation earlier the default option kicks in, this method will help y'all change this behavior.
The Advanced Arrangement Settings pane in Windows x and Windows 11 gives you the selection to pick the operating organization that will launch automatically when the computer starts up. It tin can brandish a listing of operating systems and recovery alternatives during a restart.
By configuring these settings, you lot may be able to restore a dual boot option that has been removed from Windows 10 or 11.
Note: This method involves accessing the Advanced system settings menu (nether the Almost tab) and modifying the Time to brandish list of operating systems to xxx seconds or more.
- For Settings to open, press Win + I.
- Then select Organization from the left-hand carte, and click the About tab.
- Click on Advanced system settings in the Related settings department by scrolling downwardly.
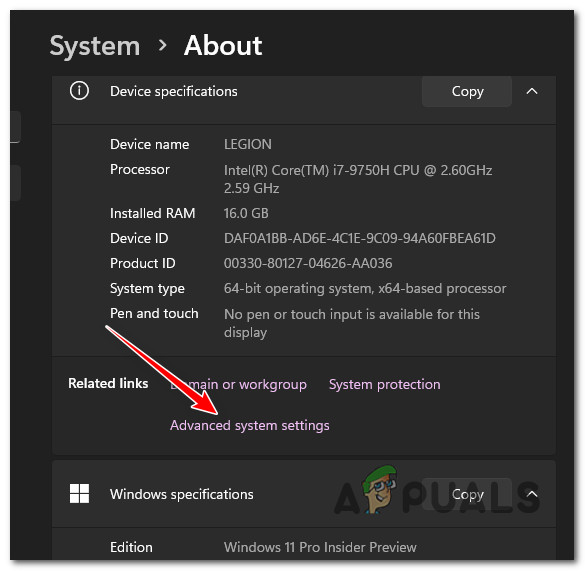
Accessing the Advanced Organization settings carte Annotation: On earlier Windows 10 machines, select Advanced arrangement settings from the left pane by going to Control Panel > Arrangement and Security.
- First, select the Advanced tab, then find the Startup and Recovery section and click the Settings button in the resulting Organisation Properties window.
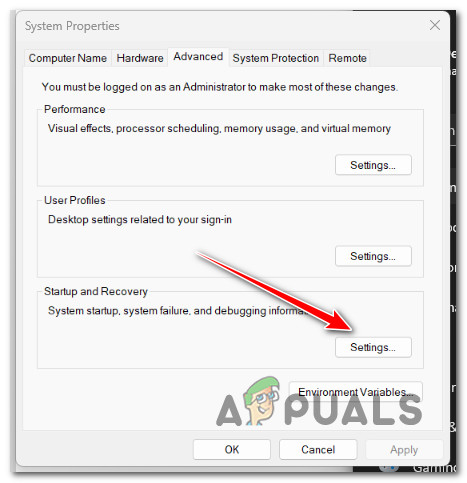
Accessing the Startup recovery bill of fare - Select your favorite OS past clicking the driblet-down pointer next to "Default operating arrangement" in the Startup and Recovery box.
- Then select 30 seconds under the Time to display list of operating systems option. If this setting is used, your figurer will brandish the kick menu for xxx seconds.
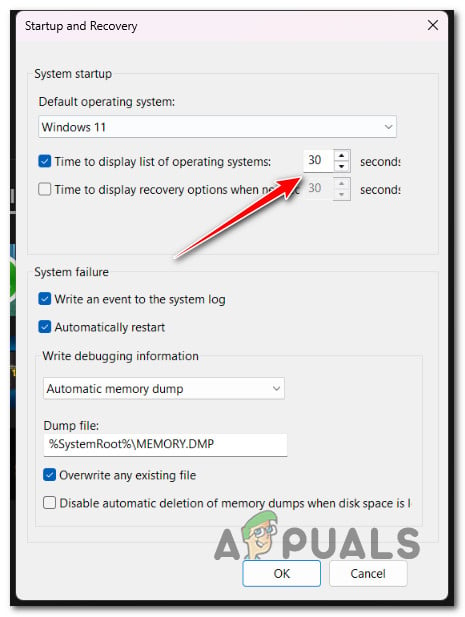
Change the arrangement startup settings Note: The operating system you chose as the default will load in one case this period of fourth dimension has passed.
- To relieve the changes, click OK, reboot your PC, and see if the dual kick menu appears.
If y'all still aren't given the choice to select between your bachelor operating systems, movement downward to the following method beneath.
iii. Re-Configure the Boot Manager (using EASYBCD)
The bcdedit command featured in the first method does non always part correctly. Either it is unable to launch the kick menu, or information technology continues to be inoperable fifty-fifty subsequently displaying the notification that it was successful.
When faced with a scenario such equally this, you can use a 3rd-party tool known as EasyBCD to create a boot entry.
Notation: EasyBCD is a uncomplicated tool that runs on the Windows platform and is bachelor for free in personal and not-business organization settings.
If you don't mind using a 3rd political party tool, follow the instructions beneath to reconfigure the boot managing director using EasyBCD:
- Start, open your default browser, visit the official EASYBCD download page and click on See More.
Note: At that place are commercial and non-commercial versions of EasyBCD. Click Register to download the free version to become the tool, then provide your login and email accost. - Launch the installer, then lookout man as the program installs itself on your estimator.
- Open EasyBCD, then choose the Edit Boot Menu option.
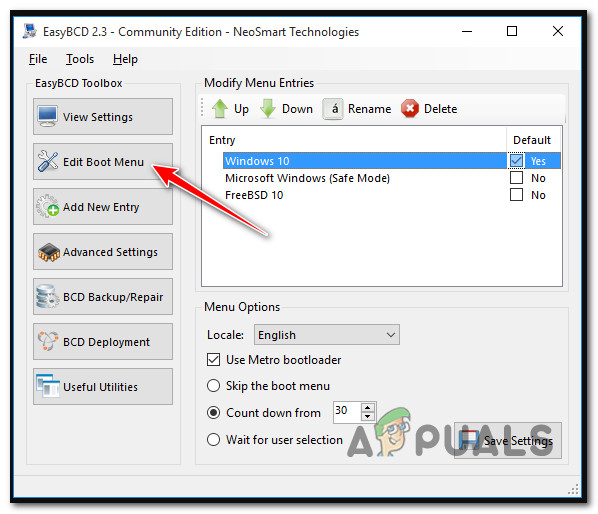
Edit Kicking Card - A dual boot entry will, by default, exist included hither. To change the default OS, check the box adjacent to the entry you wish to make default in the Default column.
- Bank check the Employ Metro bootloader box under Carte du jourOptions.
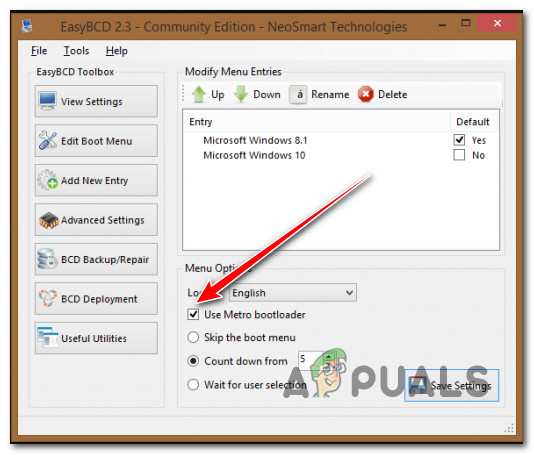
Use Metro Bootloader - Ready the timer to 30 seconds and cull Count downwardly from.
- Y'all will get the Bootloader settings saved notification successfully after clicking Salvage Settings.
- Once you have successfully modified the BCD procedure, reboot your PC and run across if you can now admission the dual kick carte du jour.
4. Disable Windows Fast Startup
The Windows 10 characteristic known every bit "Fast Startup" makes it possible for yous to start your calculator one time information technology has been close down apace. When turned on, it will store your operating organization in a hibernation file, making booting up much quicker. It is a valuable role on older computers, particularly if your system takes all the time in the globe to restart, which is 1 of the situations in which this feature comes in handy.
Still, it has certain downsides likewise. Windows will lock the installation deejay if the Fast Startup option is selected. Consequently, Windows cannot place the operating organization on a figurer gear up up to dual-kicking.
If you suspect that the fast startup functionality is causing this behavior, follow the instructions beneath to disable information technology:
Note: This method is confirmed to be effective on both Windows x and Windows eleven.
- To enter the Run dialog box and the Power Options menu, press the Windows fundamental + R.
- Afterward that, enter "powercfg.cpl" into the Run carte du jour.
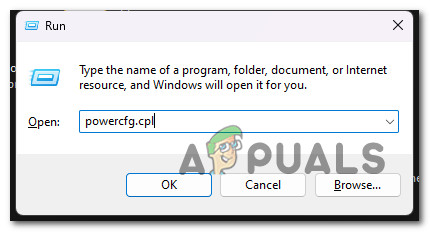
Open the Power Options menu - Select Choose what the ability buttons do from the left-side bill of fare in the Power Options window.
- Select Modify settings that are not accessible correct now from the System Settings menu.
- Later on that, click Save changes afterwards unchecking the option next to Plow on quick startup (recommended) (at the bottom of this window).

Turn on Fast Startup - Restart your calculator, and see if the dual boot menu appears on the initial screen.
If the same problem withal occurs, move to the following method below.
5. Use the System Configuration tool
If customizing the Startup and Recovery option does non produce the desired results, you may use the System Configuration tool to modify the kicking menu. Y'all can control and choose your preferred operating system (OS) in a dual boot configuration and set a timeout for the boot carte.
To configure the kicking menu with the use of the tool for system configuration, follow these steps:
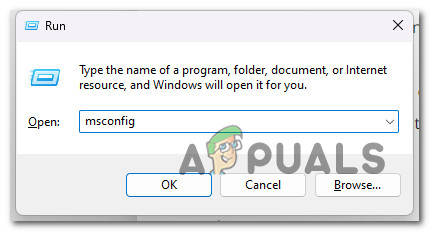
- Kickoff by opening a Run dialog box. You tin practice this by pressing the Win fundamental + R.
- To launch the Organization Configuration tool, enter msconfig and hit OK.
Open the System Configuration menu - Once you're inside, open up the Kick tab. Information technology volition display all the installed operating systems on your PC (if you have a dual boot configuration).
- Click the Set as default push after choosing the Os that isn't already the default.
- Next, enter 30 or 60 in the Timeout column.
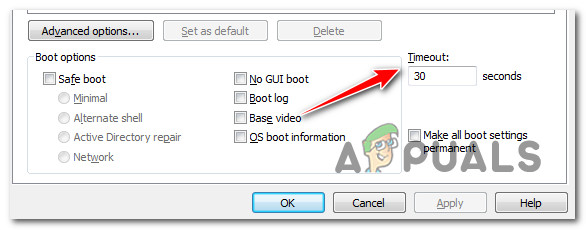
Timeout Column msconfig Note: These settings are expressed in seconds, and then if you set information technology to 30, the kicking managing director will hold off loading the default OS for 30 seconds.
- To relieve the changes, click OK and Apply. Pick Restart if a asking to restart displays.
- The dual kick option will appear equally soon as your reckoner restarts.
- To load the operating organization, enter afterwards selecting the OS with the arrow keys.
half-dozen. Deploy DISM & SFC scans
If you've come to this stage and yet oasis't found a practical solution, you lot should investigate the possibility that your dual kicking configuration has been negatively impacted by system file corruption.
Unless you want to get the third-party route, information technology would exist prudent to use a few congenital-in tools (SFC and DISM).
Note: These 2 born tools can be used to resolve system file corruption that may prevent your Bone from addressing dependencies used by Windows Update.
The almost common sorts of corruption that might cause this kind of consequence can exist stock-still past the two built-in tools, SystemFile Checker and Deployment Epitome Servicing and Management.
The best place to begin is with a System File Checker browse because it can be done without an ongoing internet connexion.
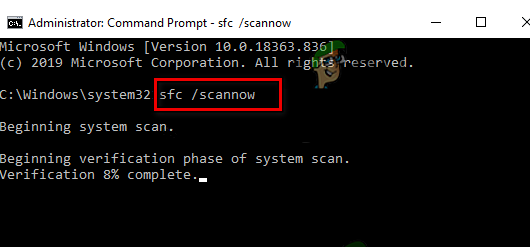
Note: System File Checker uses a locally stored cache to swap broken organisation file components with functional ones. To avoid making any further logical errors, this process shouldn't exist halted until information technology's finished.
If you're using an outdated HDD rather than a more modernistic SSD, this process might take upwardly to an hour or more than, depending on your read and write speeds.
Of import: Do non shut the window earlier the real-time tracking has resumed if the System File Checker scan in your case, temporarily stalls while running.
Once the SFC scan is consummate, restart your computer to see whether the voice mixer issue has been fixed.
If the trouble is yet in that location, run a DISM scan.
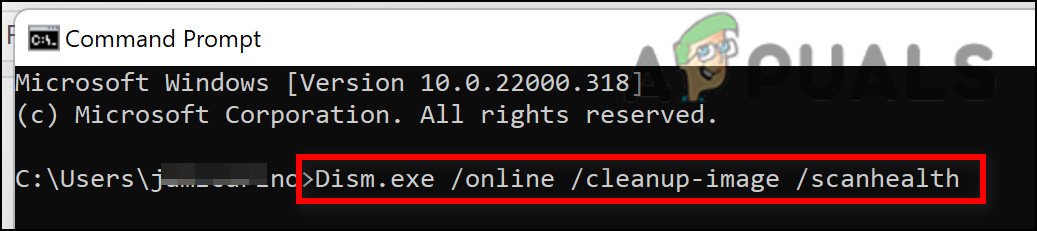
Earlier starting this process, take notation: Since DISM uses a portion of Windows Update to replace corrupted files with equivalents gratis of corruption, make sure your Net connection is steady.
Later doing the SFC and DISM checks, restart your computer to see whether the dual boot issues take been resolved.
![]()

How To Use Easybcd To Dual Boot,
Source: https://appuals.com/dual-boot-windows-10-and-windows-11-doesnt-work/
Posted by: simonsdecten.blogspot.com
0 Response to "How To Use Easybcd To Dual Boot"
Post a Comment